

If you want to setup your own GIT server, and are in a haste , then this is the guide for you. With just a few bash commands your server will be ready. This guide is specific to a Linux Ubuntu system, however you will be able to access the server from a Windows machine as well.
Do not worry if you don’t have a Linux machine. You can easily create a virtual Linux machine using Oracle VirtualBox software. For more information, refer to our post on Ubuntu virtual machine setup. Note that you will not be able to access the server unless you allow port forwarding.
The process is divided in the following steps:
- Setup SSH access to the virtual machine and create the GIT repository.
- Client side setup to access the GIT server.
- Push and clone to and from the GIT server.
- Clone a git repository to a client machine.
Server side setup (Ubuntu)
The GIT server will be setup using the Linux terminal. The table below provide the eleven commands to perform the setup. The commands can be copied by left click with the mouse, while hovering over it.
Optional modifications to the server includes removing password access and restricting shell access to GIT commands.
| Step | Description | Bash command |
| 1 | Add new Linux user | sudo adduser git_server |
| 2 | Add user to sudoers group | sudo usermod -aG sudo git_server |
| 2 | Switch to new user | su git_server |
| 3 | Go to the home directory | cd |
| 4 | Install GIT | sudo apt install git |
| Install ssh server software | sudo apt-get install openssh-server | |
| 5 | Create bare GIT repository | git init --bare my_repo.git |
| 6 | Create ssh folder and set permissions | mkdir .ssh && chmod 700 .ssh |
| 7 | Create ssh file and set permissions | touch .ssh/authorized_keys && chmod 600 .ssh/authorized_keys |
| 8 | Create ssh key for server user | ssh-keygen -t rsa -C "user@example.com" |
| 9 | Copy private key to a flash drive | sudo cp .ssh/id_rsa /media/Flash_Drive_Name |
| 10 | Add public key to ssh file | cat .ssh/id_rsa.pub >> .ssh/authorized_keys |
| 11 | Remove firewall restriction on port 22 | sudo ufw allow ssh |
The new user is added temporarily to the sudoers group. After setting up the GIT server, then the access can be removed:
sudo deluser git_server sudoCreating and sharing SSH Keys
The command that generated the ssh key, creates 2 files. The public key must be appended to the authorized_keys file, while the private key must be shared with the user that will access the GIT server. You can chose your own way to do this. In this example the key was copied to a flash drive which can be shared with a GIT user afterwards. Alternatively, the key can be created on the users machine and uploaded to the server.
Test the GIT server
It is time to test connection to the server. Before we can do that, however, we need to get the IP address of the server. If the server is on a physical machine, then the port will most likely be 22. Obtain the IP address of the server using the ifconfig bash command.
If a virtual machine was used, then the IP address of its host must be used. The port number will be as set in the port forwarding settings. Therefore, obtain the IP address using the ipconfig command:

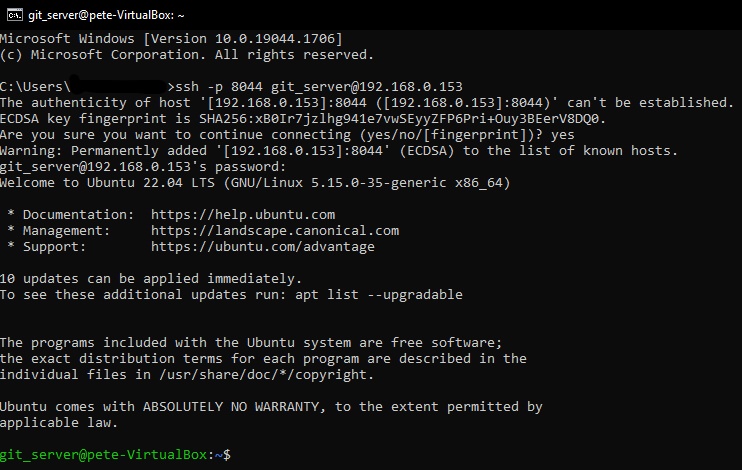
With the IP address obtained you will be able to access the shell of the GIT server. Simply execute the following command (replace port number and IP address with your own):
ssh -p 8044 git_server@192.168.0.153Provide the Ubuntu user account’s password when prompted. You will now have access to the Ubuntu shell, if all went well.
Static IP address
By default the IP address of your server will be dynamic, therefore you will need to make it static unless you do not mind to confirm it every time.
Remove password access to the GIT server
Edit the ssh server’s config file with the following bash command:
sudo nano /etc/ssh/sshd_configCopy the lines below and paste them in the terminal, which should still have the config file open.
# Disable password login
ChallengeResponseAuthentication no
PasswordAuthentication no
UsePAM no
PermitRootLogin no
PermitRootLogin prohibit-password
Save and close the file using the following keyboard shortcuts:
- CTRL + O (saves the file)
- ENTER (confirms)
- CTRL + X (exit the editor)
Afterwards restart the ssh server in order to apply the changes. Use the following command:
sudo systemctl restart ssh.serviceRestrict SSH access to GIT shell
| Step | Description | Bash command |
| 1 | Check existence of git-shell in shell file. If it is, then skip subsequent steps. | |
| 2 | Check if git-shell is installed. | which git-shell |
| 3 | Add its path to the shells file. | sudo -e /etc/shells |
| 4 | Select git-shell. | sudo chsh git_server -s $(which git-shell) |
Access to the GIT server will now be restricted to the git-shell, however you will still be able to push and pull to the repository. Consequently a ssh connection attempt to the GIT server yield the following message.

The ssh connection users will still be able to access host which the GIT server can reach, however it can be restricted by editing the authorized_keys file. Simply prepend each key with the following line:
no-port-forwarding,no-X11-forwarding,no-agent-forwarding,no-pty Client side setup (Windows 10)
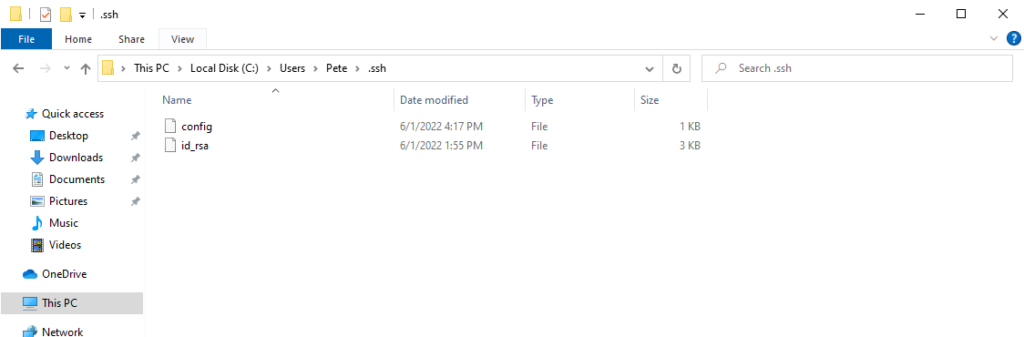
Place the private key, generated in step 8, in the default ssh folder (create the folder if it does not exist):
All that remains is to test the server, therefore open the command prompt and type:
ssh -p 8044 git_server@192.168.0.153If successful you should see familiar Linux terminal in your command prompt, similar to the view in this image.
Typing the IP address and username every time can be tedious. Fortunately this can b avoided by adding a config file to the .ssh folder, in which the following lines are saved:
Host my_git_server
  HostName 192.168.0.153
  User git_server
  Port 8022
Connection to the server can the be established with the following command:
ssh my_git_serverPush a repository to the GIT server
Open the command prompt in project folder that you want to push to the server. One way to do this is by:
- Navigating to the project folder in windows explorer
- Typing cmd in the address bar
- Hit ENTER
The black command window will pop up. Push the project folder to the GIT server with the following commands:
| Step | Description | CMD command |
| 1 | Initialize a git repository. | git init |
| 2 | Create an empty README file. | type NUL>README |
| 3 | Add all the files to the repository. | git add . |
| 4 | Commit the git repository. ** | git commit -m "Initial commit" |
| 5 | Create a remote repository. | git remote add origin my_git_server:my_repo.git |
| 6 | Push the repository to the server. | git push origin master |
** An error may occur, namely “Author identity unknown”. If so, simply follow the instructions of the error message by running the following command:
git config --global user.email "you@example.com"Clone the repository by a GIT server user
The repository can easily done with one command in the command prompt. First open the command prompt in the directory where the repository must be clone to. Type the following command and hit ENTER:
git clone my_git_server:my_repo.gitIf successful a git folder and all the folders belonging to the cloned project, will appear in the windows explorer directory.
Conclusion
This is a quick guide to get you setup your own GIT server, however you might refer to the official GIT documentation on further customization of your server.
One response to “Guide to setup a GIT server”
To whom it may concern,
.
I hope you are well. I recently came across your website and was impressed by the high quality of your content. I believe that a mutually beneficial partnership could be formed by exchanging backlinks between our websites. A backlink is a link from your website to mine, and vice versa. Backlinks are a key factor in search engine ranking algorithms, and can help increase the visibility and authority of both of our websites.
.
I am offering to exchange backlinks with you. If you are interested in this opportunity, please let me know and I would be happy to provide you with the necessary information to set up the exchange.
Our Website: https://m.cheapestdigitalbooks.com
.
Thank you for considering my offer. I look forward to the possibility of working with you and building a long-term partnership.
.
Kind regards,
David E. Smith