

This guide will take you through the process of setting up a Ubuntu virtual machine on your current PC. This guide uses a Ubuntu OS, however Windows 10 OS follows similar procedures.
The guide is divided in the following sections:
- Download the Ubuntu iso file (or the Windows 10 iso).
- Download Oracle’s VirtualBox software.
- Create the virtual machine.
- Allow port forwarding (Optional).
Download the Ubuntu iso file
This step is quite simple. Just click on this link which will take you to the official Ubuntu site. Once you are there, simply click on the download button and you are done.

Download Windows 10 ISO
If you prefer a Windows operating system, then follow this link to download it from the official Microsoft site. Once there, click on the “Download utility now” button. After the download is complete, you can follow the GUI’s instructions to create the ISO file.
You do not need a Windows key to create the virtual machine, however there will be some limitations to the operating system.
Download the Oracle VirtualBox
Oracle’s VirtualBox tool will be used to create the virtual machine, which you can download from their official site. Select the operating system of your host machine as well as the VirtualBox extension pack links.
Create the Ubuntu virtual machine
With all the downloading complete, you can proceed to the actual setup. Firstly install the VirtualBox manager by opening the setup wizard, followed by a few “next”, “install” and “finish” clicks. Once that is done the VirtualBox manager should appear.

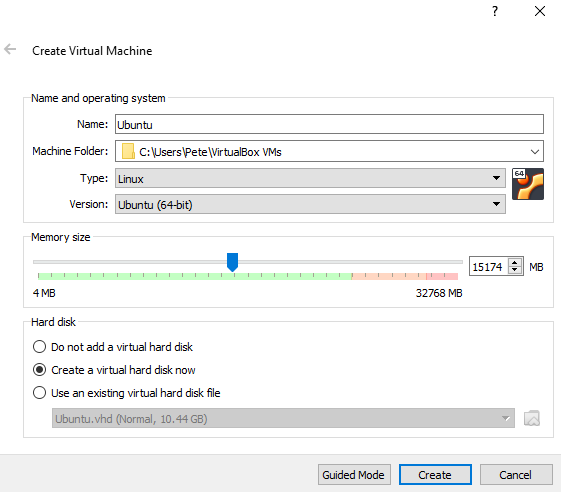
Add a new virtual machine by clicking on “New”. A setup wizard will pop up, which will guide you to create a new virtual machine.
Run the Ubuntu virtual machine
Start up the virtual machine by double clicking on its icon, which should be located on the left side panel of the VirtualBox manager. Next you will be requested to provide a iso file, followed by the standard Ubuntu setup procedure.
Install the guest addition tools
The guest addition tools are required to enable some functions, namely:
- shared clipboard between host and guest machine.
- drag and drop between host and guest.
- screen resolution similar to host.
First we need to add the downloaded extension pack to the VirtualBox manager. Go to File > Preferences > Extensions then click on the green plus to add the extension pack.
Start the Ubuntu virtual machine again, then click on Devices > Insert Guest Additions. With that done, install the media with the following bash command.
sudo /media/$(whoami)/VBox*/autorun.sh && rebootUbuntu virtual machine screen size
At this stage the virtual machine probably has a small screen. With the Guest additions installed you can click RCTRL + F to toggle full screen. If the screen stays small, then shut down the virtual machine. Once it is shut down edit the display settings in the manager. You might need to increase the video memory as well as enable 3D acceleration.
Allow port forwarding
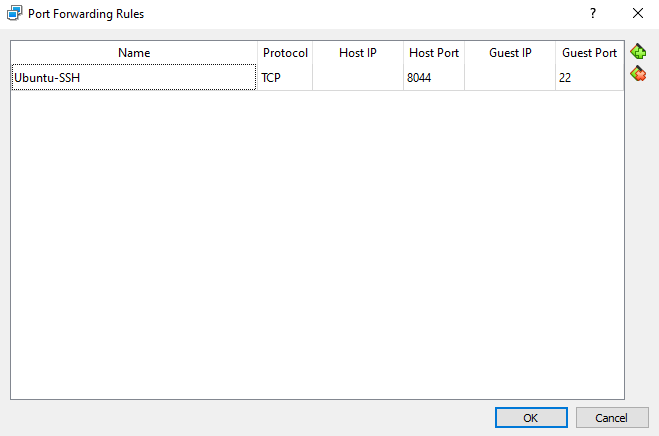
You will require port forwarding to use the virtual machine as a server, such as a GIT server. Therefore, you will need to edit the Network settings of the Ubuntu virtual machine. Go to Network > Advanced > Port Forwarding, after which a window will pop up. You can now specify the IP address and Ports. For example, to allow port forwarding for a GIT server, refer to the image below.
Conclusion
We hope that you found this guide helpful, however if you require further clarification on any aspect, please comment.
2 responses to “Ubuntu virtual machine on Windows guide”
Excellent and practical guide, making a complex task easy. Thank you.
Very helpful! Can you translate in Afrikaans?